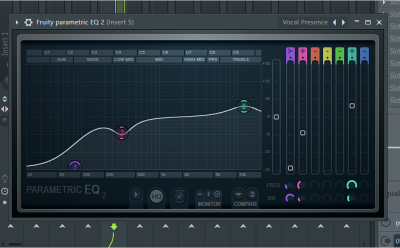
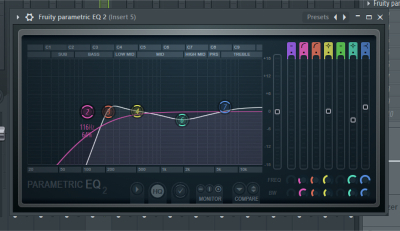
General guidelines to start with for Male Vocals EQ
Equalizing (EQ) male vocals involves adjusting the balance of frequency bands in the vocal track to achieve a desired sound.
Here are some general guidelines for EQing male vocals:
1. Start by cutting frequencies below 80 Hz to remove any unwanted rumble or low-end noise.
2. Boost frequencies around 250 Hz to add warmth and fullness to the vocals or 120 hz for a rich warming tone. Experiment with your artists voice.
3. Cut frequencies around 1-5 kHz to reduce harshness or sibilance.
4. Cutting around 600 HZ may help with muddiness issues. Test it out.
5. Boost frequencies around 3-6 kHz to add clarity and presence to the vocals.
6. If necessary, use a high-pass filter to cut frequencies above 10 kHz to remove any harshness or sibilance.
It is important to use EQ judiciously and not overdo it, as too much EQ can result in a distorted or unnatural sound.
It is also a good idea to use a spectrum analyzer or reference tracks to help you visualize the frequency spectrum and make informed decisions when EQing vocals
Just some examples


General guidelines to start with for Female Vocals EQ
When it comes to EQ for female vocals, there are some general guidelines you can follow to enhance the clarity, presence, and overall quality of the sound.
Keep in mind that every voice is unique,
so it’s important to use your ears and adjust these guidelines to fit the specific characteristics of the vocalist and the mix.
Here are some general guidelines for EQing female vocals:
1. Low-End Roll-off: Female vocals generally don’t have much low-end energy,
so it’s often beneficial to apply a high-pass filter to remove unnecessary rumble and low-frequency muddiness.
Start with a gentle slope and adjust the cutoff frequency to remove any unwanted low-end information that may be present.
2. Presence Boost: Boosting the presence frequencies (around 2 kHz to 6 kHz) can add clarity, intelligibility, and a sense of air to the vocals.
This range helps the vocals cut through the mix and ensures they’re not buried by other elements.
Be subtle with the boost and adjust it to find the right balance without making the sound harsh or sibilant.
3. To add some presence, warmth and clarity in the Mid frequencies, boost or cut as needed around 165 hz – 255 hz.
4. Taming Harshness: If you encounter any harsh or sibilant frequencies in the vocals, you can use a narrow-bandwidth parametric EQ to reduce those frequencies.
Sweep the frequency range and identify the harshness, then make slight cuts (around 2-4 dB) to alleviate the problem.
Be careful not to overdo it, as it can make the vocals sound dull or unnatural.
5. De-Essing: Female vocals often have sibilance in the upper frequency range, particularly on “s” and “sh” sounds.
A de-esser can be used to specifically target and reduce these sibilant frequencies, keeping the vocals smooth and controlled.
Adjust the threshold and intensity of the de-esser to effectively tame the sibilance without losing the natural character of the vocals.
6. Body and Warmth: If the vocals sound thin or lack warmth, you can add some presence and body in the lower mid-range frequencies (around 200 Hz to 800 Hz).
Gentle boosts in this range can help bring out the natural richness and warmth of the vocals, giving them more depth and weight.
7. Breath Control: Depending on the recording, you may want to reduce the prominence of breath sounds in the vocals.
Apply a gentle roll-off in the higher frequencies (above 10 kHz) to tame any excessive breath noise or high-frequency artifacts.
This can help create a cleaner and more polished vocal sound.
8. Frequency Notching: If there are specific frequency clashes between the vocals and other elements in the mix (e.g., guitars, synths, or cymbals),
you can apply narrow cuts in the vocal EQ to create more space and separation.
Identify the frequencies that clash and make small cuts to alleviate the overlap without significantly affecting the overall vocal sound.
Remember, these guidelines are not strict rules, and the specific adjustments will depend on the vocalist, the recording, and the mix.
Always trust your ears and make adjustments based on what sounds best in the context of your mix.


